Floor Scrubber Care: Instructions and Insights for Operators
Maintaining a clean and safe environment is crucial in any commercial space, and floor scrubbers play an essential role in achieving this goal. These machines, designed to efficiently clean hard floor surfaces, require regular attention to ensure optimal performance. Understanding the basics of floor scrubber care is vital for operators aiming to extend the lifespan of their equipment.

Neglecting floor scrubber maintenance can lead to decreased efficiency and costly repairs. Preventive maintenance is not just a suggestion; it is a necessity that helps avoid unexpected breakdowns and keeps machines running smoothly. By adopting a routine that includes daily tasks, operators can ensure their machines operate at peak performance.
This article will provide you with essential instructions and insights on floor scrubber care, highlighting the importance of preventive measures. From daily checklists to tips for enhancing maintenance routines, you’ll find valuable information that will aid you in maintaining your equipment effectively.
Daily Maintenance of Floor Scrubbers
Step 1: Drain the recovery and solution tank
Draining the recovery tank after cleaning is essential for good equipment hygiene and to prevent build-up. The dirty water in the recovery tank is harboring bacteria that can start to grow, causing foul odors. When you clean with an automatic scrubber, the vacuum motor blows air from the recovery tank into the environment, so a clean tank prevents the spreading of foul odors.
Rather than daily, the solution tank should be drained and cleaned about once per month. Your machine probably has a solution strainer between the solution tank and the scrub deck. If it does, remove the strainer and clean the screen when you drain and clean the solution tank.
Pro Tip: If you missed this step in the past, check out this article to freshen up your tanks: Say Goodbye to Stinky Scrubbers: How to Eliminate Odors from Your Floor Scrubber
Step 2: Rinse the solution and recovery tank
Follow up the draining process by rinsing with clean water. Use a hose to spray around the upper portions of the tank and the sidewalls to thoroughly clean the tank. If you do this consistently, you can prevent build-up.
Step 3: Clean the recovery tank filter and float.
First clean the vacuum shutoff mechanism. Depending on your machine, this might be a ball float that seals the vacuum tube or a float switch. Next, clean out the large debris strainer in the recovery tank. Many scrubbers have a bin in the recovery tank to catch large items like pieces of paper or rocks. Clean this area to prevent these items from entering the recovery tank and clogging the drain hose.
Step 4: Clean the brushes or pad drivers
Now that the tanks are clean, turn your attention to the brushes and pad drivers. Remove the brushes or pad drivers and inspect them. If you use brushes, remove any debris like string that might get wrapped up in the bristles. If you use pad drivers, remove the pads and clean the drivers.

Step 5: Remove and clean the squeegee assembly and blades
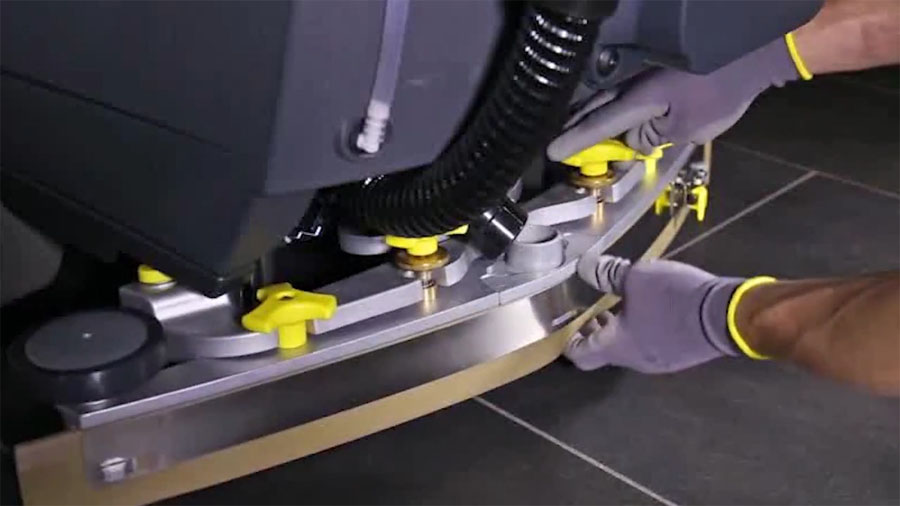
Frequently, there will be a buildup around the squeegee blades of small gritty debris that was missed during dust mopping. Start by rinsing the squeegee thoroughly then use a cloth to remove any remaining debris. While cleaning, inspect the blades for wear and tear. If the squeegee blades are damaged, change them. Remember that most squeegee blades are built to be flipped around and rotated so you can use all four edges of the blade.
Step 6: Let EVERYTHING air dry
Now that the machine and its accessories are clean, let everything air dry in a well ventilated room. Allowing a commercial floor scrubber to air dry after use is crucial for preventing the growth of mold, mildew, and bacteria in areas like the recovery tank and brushes. This not only keeps the machine cleaner and reduces unpleasant odors but also extends its lifespan by protecting against moisture-related damage, such as rust and corrosion in metal components.
Step 7: Charge the batteries
The final step is to charge the batteries so the machine is ready to go for tomorrow. This subject is a bit too complicated to summarize here, so if you need more information check out this article: Maximizing Lead-Based Battery Life: Essential Maintenance for Floor Cleaning Equipment
Importance of Preventive Maintenance
In addition to the daily maintenance outlined here, a good preventive maintenance program can help extend the life of your cleaning equipment. For more information on preventive maintenance, check out this article: Developing a Preventive Maintenance Program for Cleaning Equipment.
Hillyard can also do preventive maintenance for you. Use the "I'm Interested" form below to let us know if you'd like us to contact you.
Hillyard can help you establish your daily maintenance program
Hillyard sales representatives are available nationwide to assist you with all your equipment maintenance and training needs. Our knowledgeable team can help ensure your cleaning equipment is maintained properly to extend its lifespan and maximize efficiency. Whether you need hands-on training or expert advice on preventive maintenance, Hillyard representatives are here to support you. With representatives located throughout the United States, help is always within reach. Simply fill out the "I'm Interested" form, and we will follow up promptly to provide the assistance you need.